Week 5: Mesh Detailing and Set Dressing
- Stevie Tewfik
- May 4
- 4 min read

Updated: May 6
Now that I have my modular kit fully set up, I thought I'd dedicate this week to creating some props that I could use to populate and "dress" my scene. Upon checking a few weeks ago what generally goes into levels in Diablo, I made a list of a few objects I wanted to model and texture.
I planned on making:
A barrel
A bookshelf
A "casket"
Also, when looking into trim sheets, I discovered a concept called "texel density". Texel density is defined as the amount of texture pixels (or texels) that cover a specific amount of 3D surface area. The second aspect of texel density is that the TD values of each asset should be similar across a project or game, depending on how far or close they are to the camera. For "top-down" games, it should be around 2.56. This meant that smaller assets (like my barrels) use smaller texture sizes like 1024x1024.
Like every asset, I began with a low poly model in Maya, and brought it into ZBrush. After adding some noise to the metal areas and splitting up my wooden planks into separate pieces, I brought it into Substance Painter.

Ever since making my main trim sheet, I exported the materials that I used for it into "smart materials". This is going to let me use the same materials across my whole project, which allows for a level of cohesion between all of my assets. I also used my moss material in a position and light generator to add a realistic moss build up in appropriate areas of the model.

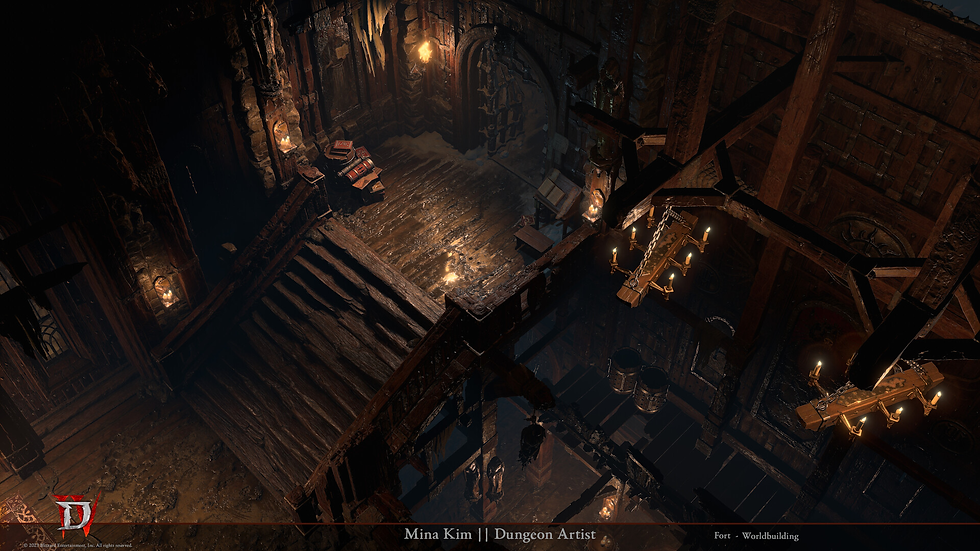
After having brought them into my scene, I duplicated and scattered them in the corner of the main room. I really wanted to fill up the back wall of this room, so moved onto creating an intriguing object I had scene in one of my reference images below.
I am calling it a "scribe table". It looks like a writing table, with a large book placed on it and some extra notes pinned up on it. There is also a stool/ step just by it which the user would stand on which is at quite an interesting height as it seems too low to sit but pointless if someone wants to stand up.
Regardless, I took it through the Maya, ZBrush "low-to-high" pipeline and finished in Painter. However, I wanted to add a new level of detail to this prop in particular, as it wouldn't make sense for the book to be empty. I looked up some books about/ from the Diablo games, and saved a few of them.

I then converted them to greyscale and edited the levels so that they turned into high-contrast black and white images I could use as alphas.

I then used the "projection" tool within Painter to use as a black mask, then created a simple "ink" material which would be overlayed on top of my basic paper texture. I was very happy with how it looked in-engine, and the extra grunge maps I added over the top really gave it a "used" feel to it.

The final object I wanted to use to fill out this rear wall was a bookshelf. This would be a much larger object than the previous 2 assets, so I gave it a larger texture at 2048x2048. My main source of reference was a really old, low resolution screenshot of a bookshelf from Diablo II Resurrected, as you can see below. I liked the wide design, and it gave me an excuse to create lots of small props to fill the shelves.

I had quite a lot of fun creating this asset, as there was so much in it. I made a tankard, key, plate, urn, pot, scrolls, chest and a book which I recoloured and rescaled to add variation to the shelves. I have also noticed that my assets are generally appearing lighter than they are in Painter, so when it comes to lighting, I'm going to try and make my scene a lot darker, whilst still retaining visible detail in my meshes.

At this point, I had made a lot of wood-based assets, so I wanted to focus on something made entirely of stone. Additionally, considering my level is set in a catacombs-type place, there had to be some objects reflecting the burials carried out, so I settled on a stone casket.
This is probably my favourite asset I have made so far, as I think I worked the proportions quite well in relation to the rest of my scene. I used a variety of references images all from my original mood board to create my low poly model.

Of course, I created a high poly model in Zbrush after having added subdivision levels from a higher level of detail. I found an amazing set of stone and crack alphas for free use online, created by Paul Tosca. I used these and my modelling techniques to create a convincing, damaged stone structure which I baked back onto my low poly model.

I again used my position and light moss masks, which gave me a very simple version of blending from my floor material into the asset, although now I have realised that the moss on the floor is at a different scale to that of the casket, so I will have to increase its tiling at some point.

I'm extremely happy with the number of highly detailed props I have made this week, and how well they "fit together". I think I can get quite a lot of mileage out of them, especially the barrels as I can have some falling over, and I haven't even considered adding decals into my scene yet.

At some point, I might try using the open book model from my scribe table to scatter over the floor to help further break up the tiling of the ground. I want to create a few simulations next week as adding movement to my scene will really help it come to life.
Bibliography/ External Reading:
_______________
“Mina Kim.” ArtStation, 2025, www.artstation.com/hminakim. Accessed 25 Jan. 2026.
Peel, Jeremy. “Diablo III: Reaper of Souls’ 148-Page Heaven-Sent Companion Book Descends.” PCGamesN, 28 Nov. 2013, www.pcgamesn.com/diablo/diablo-iii-reaper-souls-148-page-heaven-sent-companion-book-descends.
"TokeEmUpJohnny.” Reddit.com, 2026, www.reddit.com/r/Diablo_2_Resurrected/comments/w8vzbf/yes_bookshelves_do_exist_in_d2r_yes_they_still/.
Fuchs, Simon. “[ZBRUSH] – Sculpting Damage – Alphas and Brushes.” SimonFuchs, 24 May 2015, simonfuchs.wordpress.com/2015/05/24/zbrush-sculpting-damage-alphas-and-brushes/.


Comments