Week 7.5 - My Shrine Hero Asset
- Stevie Tewfik
- May 5
- 4 min read

Updated: May 6
After having done work on the boss room this week, it only made sense to make my hero asset now. The main reason for the boss room was to centre itself round my hero asset, which I decided should be a statue of a knight (in quite a dynamic pose).
I originally had this idea all the way back when the assignment brief was issued, it was something that jumped out at me, so I had to bring it to life as one of the focuses of this project.
I began by researching statue designs from within videogames, and found this particular example quite fitting, created by Santiago Stucky.

I also wanted a much more "battle-like pose", which is where Kylo Ren comes into the equation. I'm a massive Star Wars fan so I thought I would draw inspiration from things that reflect my personal interests, giving the level a bit more character. I found this completely random Japanese "ArtFX" statue online, and really liked the pose they had chosen.

I didn't want to do as "bulky" armour as Santiago had chosen, so I chose a halfway point between my 2 references, and began modelling within Maya. I wanted to go with a somewhat "blocky" design, as if it had been sculpted by hand at a very large scale.
I began with the legs (with each being a duplicate of the other), whilst again combining my references into one half-human, half-armoured model. As you can see below, I created knee armour like that of Santiago's knight but quite thin feet like Kylo Ren.

This trend continue for the rest of the model, until I was happy with what I had achieved. I had thought of sculpting this statue in ZBrush, though considering how "hard-surface" it is I decided to stay in Maya. I worked my way up, created a torso with a "belt" area like Kylo once again, and then moved on to the arms.

These were a bit more armoured, with my inspiration for the forearm piece coming from Obi-wan Kenobi's main outfit in the Clone Wars TV series. I liked how it came up to cover the elbow, so I worked this into my design. As for the hands, I made distal, middle and proximal sections of each finger, as traditional knight armour would've been made from.

I'm especially happy with how well the helmet turned out. Once more combining my references, I created a smooth, but also sharp design that has a good silhouette. Split into 3 different pieces (the "head", top section and mask) it allowed me to more easily create the high poly once I brought it into ZBrush.

The final part, was his broadsword, which was probably the easiest part of the model. Again, I had to keep it realistically proportioned to the knight itself, giving it enough grip space for 2 potential hands, and then a long, broad blade.
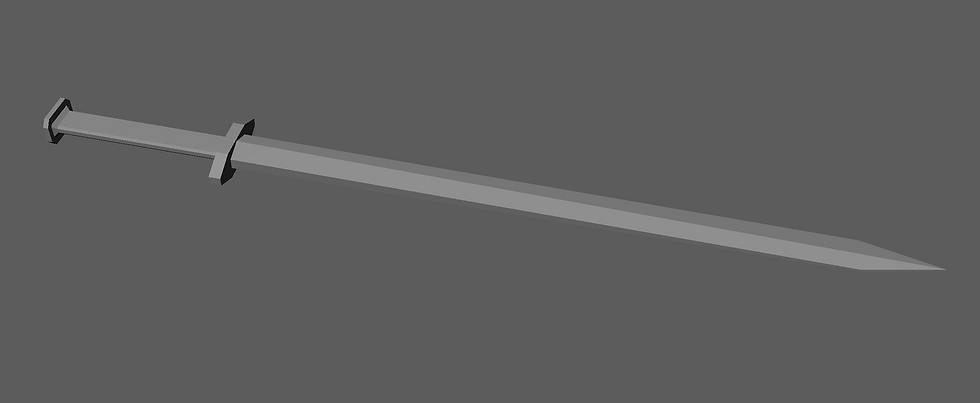
After having completed this section, it was time to UV unwrap the whole model. I originally tried to optimise this asset further, by stacking some of the shells of any limb pieces that I duplicated, however when it came to adding my moss generators onto the model in Painter, there were some issues I will discuss soon.
This is the final pose I have chosen, I'm particularly fond of how convincing he's looking down the blade, as if at an enemy.

Here is the same shot, but with wireframe on so you can view my topology, which I am very happy with.

I managed to pack the hands into the bottom left section of the UV space, and allowed my layout to use rotation, as this was a hero asset there was no need for the UVs to be set out in a particular way. I'm quite happy in how optimised I made this map, as there's not much space for any other UV shells to be placed. After the low poly model was finished, like usual, it was time to move on to the high poly.

I actually created this low poly model before any of my other props (like the casket and hooded statue) I just reused some of the pieces in those models after I had originally created this, this just seemed more of a appropriate place to include a workflow breakdown.
I exported the statue from Maya in completely different pieces, as I planned on doing "bake via mesh name" in Substance Painter, and it allowed me to achieve a higher level of detail in ZBrush, as I could dynamesh each section separately. You can also see the polycount here, at only 4297 faces (which of course would be triangulated in Unreal).

Using mallet fast, trim dynamic, clay building, orb flatten edge, the smooth brush, and the Paul Tosca alpha pack, I think I created a very convincing "stone" look.

Like usual, then into Painter, where I had quite a fun time texturing considering the bake turned out so well. This is where I realised the problem I mentioned earlier, because I had stacked some of my UV shells, it meant that certain areas (like the top of the thighs) were getting affected by certain generators where it didn't make sense. So, I went back into Maya, separated these shells and layed them out again.
I reimported my mesh, and it was perfect. Pictured below is my end result from within Painter, ready for export into Unreal.

Here is the final look, like everything it is a bit lighter than in Painter, however I had a way to combat this.

I used a "Constant3Vector" and exposed it as a custom parameter, feeding it (and my albedo map) through a "BlendOverlay" node, which allowed me to add a "tint" of any colour I wanted to the model.

That about sums up my hero asset. I'm so happy with how "cool" it looks, and I think I made the correct decision with going for a large, dynamic statue as my chosen shrine asset.
Bibliography/ External Reading:
_______________
Stucky, Santiago. “Knight Statue, Santiago Stucky.” ArtStation, 2025, www.artstation.com/artwork/zxxdv4.
Rebelscum. “Rebelscum Star Wars Photo Archive.” Rebelscum.com, 2022, www.rebelscum.com/2016-SDCC/2016-SDCC-Kotobukiya-Kylo-Ren-ARTFX-Statue/image1.asp.
Sweaty-Suit3772. “Reddit - Please Wait for Verification.” Reddit.com, 2024, www.reddit.com/r/StarWars/comments/1advzee/why_did_anakin_and_obi_wan_switch_from_having/.
Fuchs, Simon. “[ZBRUSH] – Sculpting Damage – Alphas and Brushes.” SimonFuchs, 24 May 2015, simonfuchs.wordpress.com/2015/05/24/zbrush-sculpting-damage-alphas-and-brushes/.


Comments